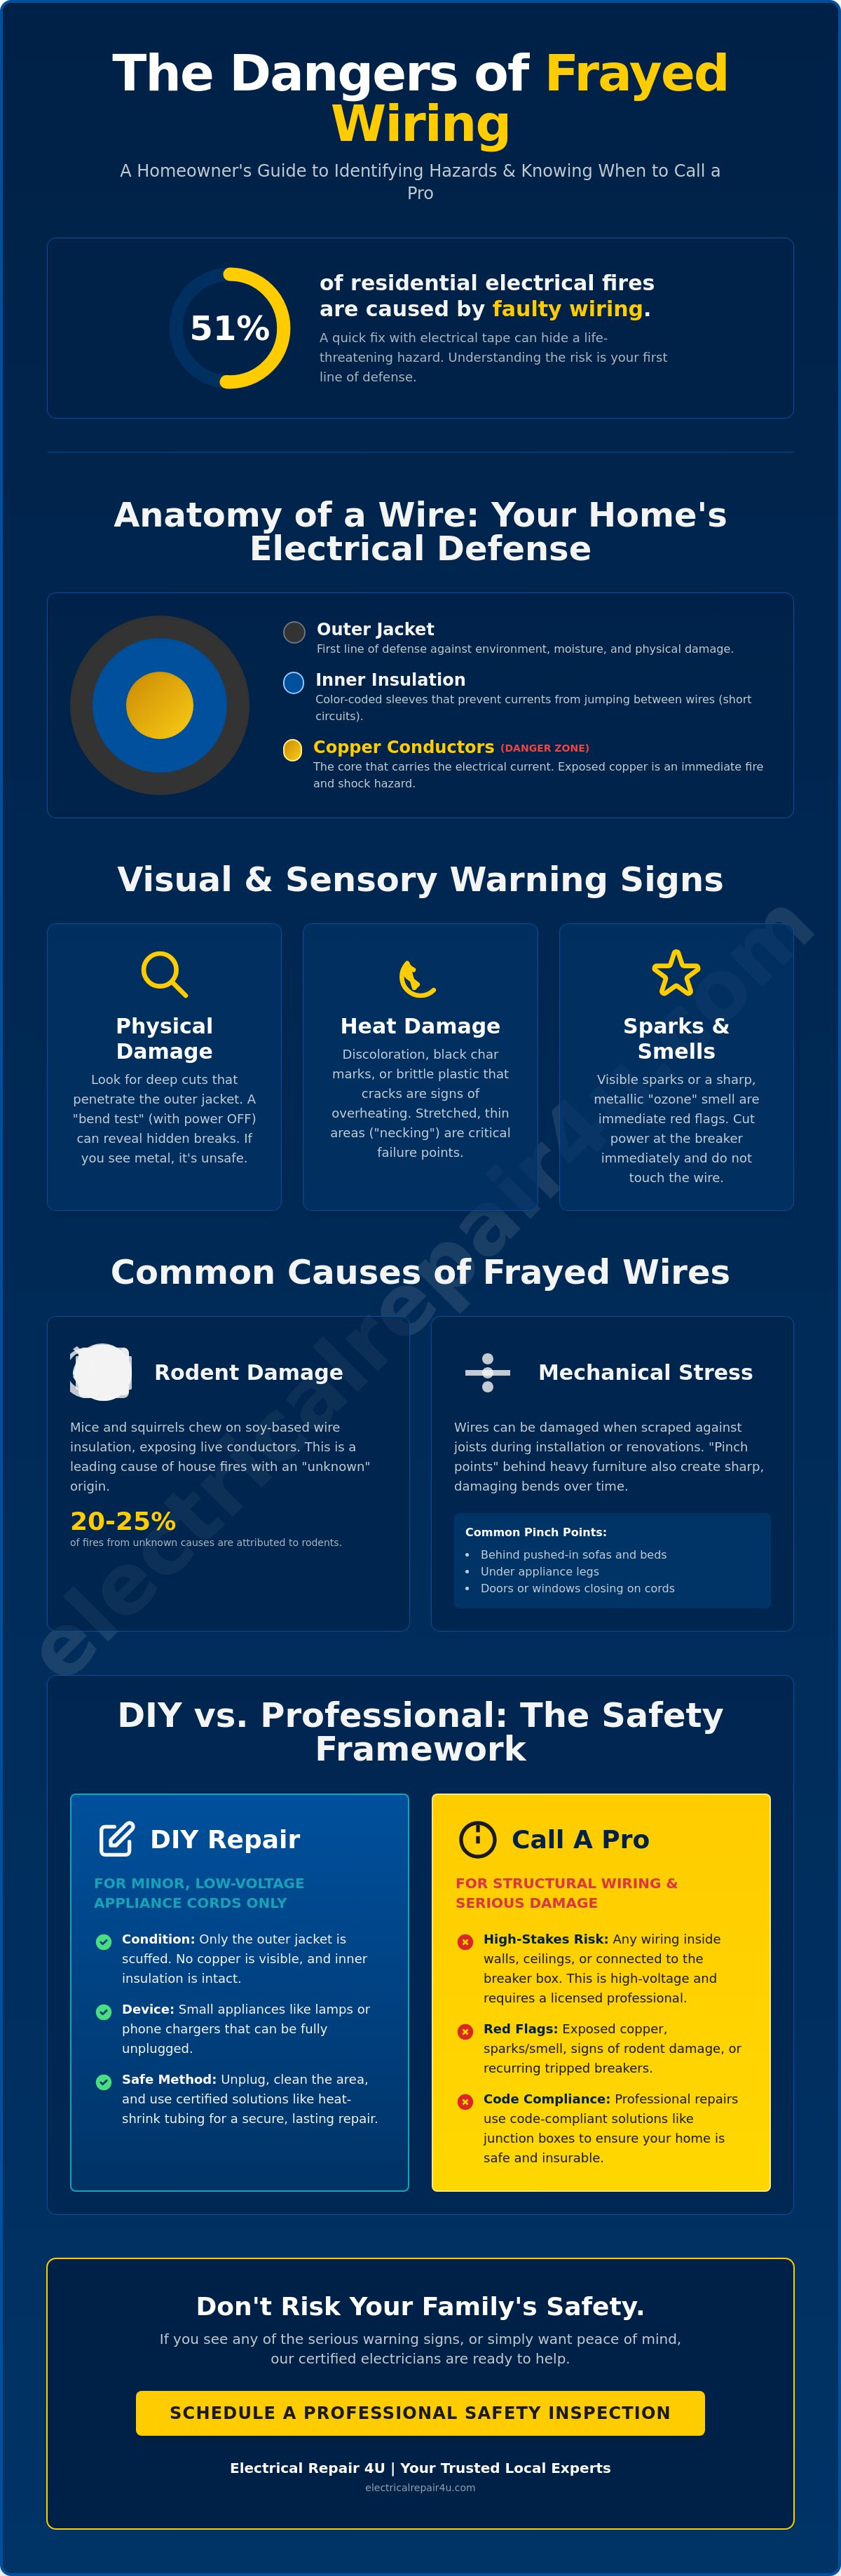
Did you know that faulty wiring was responsible for 51% of residential electrical fires according to a 2020 report? It's a sobering thought when you spot a chewed cord or a cracked casing behind your sofa. You might feel tempted to reach for a roll of electrical tape and call it a day, but that quick fix often hides a much deeper danger. We understand that seeing exposed copper creates instant anxiety about your family's safety and the potential costs of a major fix. When you need to repair frayed wiring, knowing the difference between a minor cosmetic issue and a structural hazard is your first line of defense.
We're here to help you navigate these technical waters with confidence and ease. In this guide, you'll learn how to identify different types of wire damage, assess the severity of the situation, and perform basic repairs safely. We'll also clarify exactly when a DIY approach reaches its limit so you can avoid the high-stakes risks of improper electrical work. Our goal is to provide the knowledge you need to keep your household running smoothly. By the end, you'll have a clear plan to restore your home's security and prevent future damage before it starts.
Key Takeaways
- Identify the difference between minor cosmetic wear and critical structural damage to your home’s electrical system.
- Understand the "Voltage Rule" to safely decide between a quick DIY fix for small devices and professional intervention for high-voltage circuits.
- Learn the correct steps to repair frayed wiring on simple appliance cords using proper cleaning and insulation techniques.
- Discover why structural wiring requires code-compliant solutions like junction boxes rather than just a layer of electrical tape.
- Protect your property from local hazards like rodent damage and mechanical stress with expert restoration techniques.
Identifying Frayed Wiring: When Does a Wire Become Dangerous?
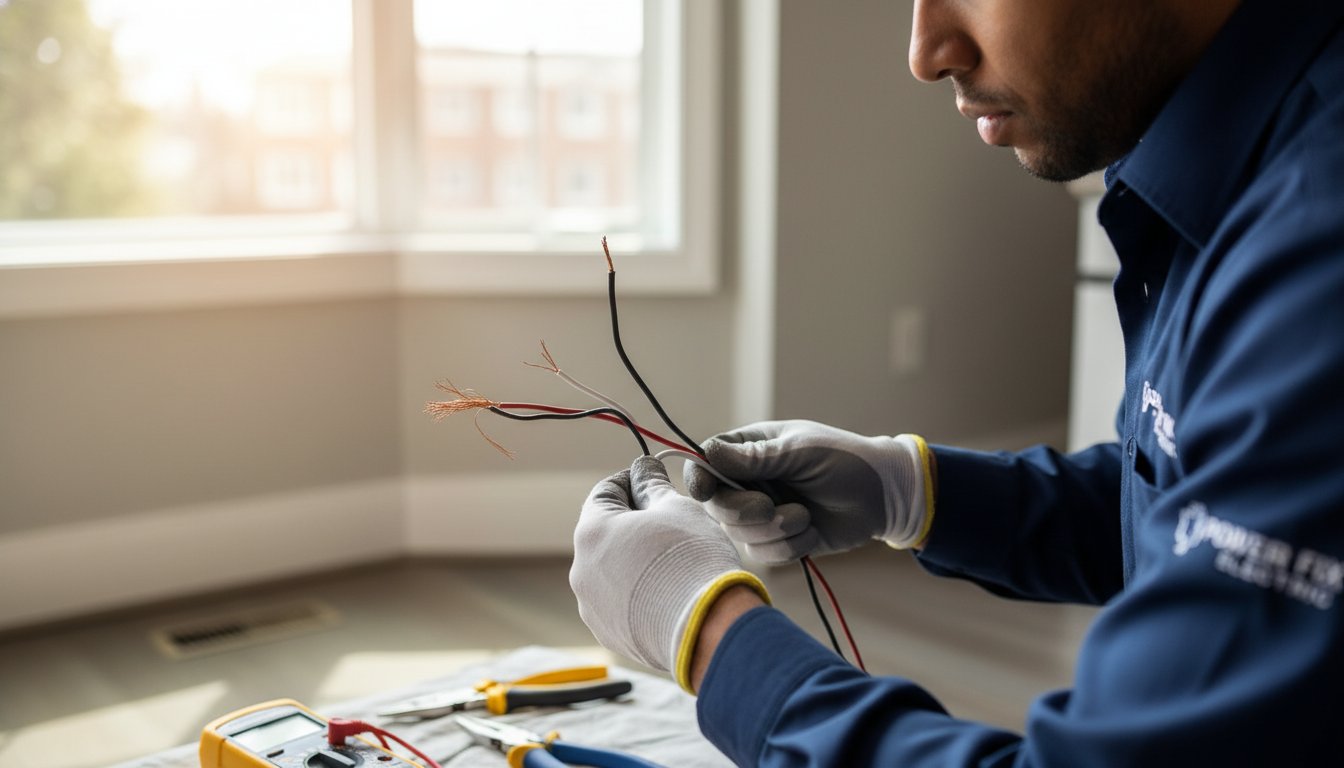
You might notice a wire that looks a bit "fuzzy" or worn behind an appliance and wonder if it is a real problem. Frayed wiring is the degradation of the protective insulation that eventually exposes the internal conductors. It is much more than a cosmetic eyesore; it is a structural failure of your home's electrical defense system. Understanding Electrical wiring safety standards helps you see why every single layer of a wire serves a critical purpose in keeping your family safe.
Think of your wiring like a heavy winter coat. You have the outer jacket, which acts as the first line of defense against the environment. Beneath that is the inner insulation, those color-coded sleeves that keep electrical currents from jumping between individual wires. Finally, you have the copper conductors at the center. These carry the actual power. When the jacket and insulation fail, that copper becomes exposed to the air and nearby materials. When you need to repair frayed wiring, you are essentially restoring these vital protective barriers.
Exposed copper is an immediate arcing and fire hazard. If electricity jumps from the wire to a nearby surface, it generates intense heat that can ignite dust, insulation, or wood framing. We want you to stay secure, so here is a neighborly warning: if you ever see sparks or smell a sharp, metallic "ozone" scent, stop what you are doing immediately. Cut the power at the breaker. Don't wait to see if the smell goes away on its own.
Visual Signs of Wire Degradation
Look closely at the physical shape of any suspicious wires. You might notice "necking," where the wire has been pulled or stretched so thin that the diameter actually shrinks. This creates a bottleneck for electricity and leads to rapid overheating. Also, check for any discoloration or black char marks on the plastic. These marks aren't just dirt; they are signs that the wire has already been "cooking" from the inside. If the plastic feels brittle or cracks when you touch it, heat or UV exposure has likely ruined its flexibility.
The Difference Between Surface Scuffs and Deep Frays
Not every mark on a cord requires you to repair frayed wiring, but you must know how to tell the difference. A surface scuff only affects the very top layer of the outer jacket. A deep fray, however, penetrates through to the inner insulation. To test this, you must first ensure the power is completely off. Never touch a live wire to inspect it. Once it's safe, perform a "bend test." Gently flex the wire at the site of the damage. If the inner insulation stays intact and doesn't reveal any copper, the damage might be superficial. If the bend reveals even a tiny glint of metal, the wire is no longer safe.
Common Causes of Frayed Wiring in Illinois Homes
In our local communities like Warrenville and Naperville, we often find that the biggest threats to your home's safety are the ones hiding in the dark corners of your attic. While we've discussed how to spot damage, understanding why you might need to identifying home wiring hazards is the next step in protecting your property. Many older homes across DuPage County still feature pre-1970s wiring that simply wasn't designed for the heavy electrical loads of modern life. Over time, this age-related wear combines with environmental factors to create dangerous conditions. When you need to repair frayed wiring, the cause is often a mix of nature and human error.
Rodent Damage: The Silent Fire Starter
Mice and squirrels are more than just a nuisance; they are a direct threat to your electrical system. Modern wire manufacturers often use soy-based materials for insulation. While this is better for the environment, it actually attracts rodents, turning your home's infrastructure into a buffet. You might notice flickering lights or breakers that trip for no apparent reason. These are classic signs that a critter has been gnawing away. In fact, rodents are responsible for an estimated 20-25% of house fires where the cause is listed as unknown. If you suspect your attic has become a snack bar for local wildlife, a professional Electrical Repair inspection can put your mind at ease.
Mechanical Wear and "Pinch Points"
Sometimes, the damage comes from the way we live in our homes. Mechanical stress occurs when wires are "fished" through tight joists or wall studs during a renovation, causing the insulation to scrape against rough wood or metal. We also see many "pinch points" behind heavy furniture or appliances. If a sofa is pushed tight against a plug, it creates a sharp bend that eventually breaks down the internal copper. Doors or windows closing on extension cords create hidden frays that you can't see from the outside. Even a well-intentioned DIY project can go wrong if staples are driven too deep into Romex wiring, crushing the jacket and creating a hot spot.
Heat and chemistry also play their parts. Overloaded circuits generate excessive heat that can melt insulation from the inside out, even if the wire looks fine on the surface. In garages or workshops, common household chemicals can dissolve wire jackets over time if they aren't properly protected in conduit. Whether it's a curious squirrel or an overloaded outlet, catching these issues early is the key to a safe, stable home.
DIY vs. Professional Repair: The Safety Framework
Deciding whether to handle an electrical project yourself or pick up the phone depends on a simple principle we call the Voltage Rule. For anything running at 12 volts or less, you're generally in the clear to attempt a fix. This includes your phone charger or the DC side of a laptop power brick. However, once you cross into the 120-volt territory of your home's wall outlets and structural lines, the stakes change instantly. Attempting to repair frayed wiring on high-voltage lines without the proper training is a gamble with your safety. 120 volts is more than enough to cause serious injury or start a fire that spreads through your walls before you even smell smoke.
A common mistake is thinking a few wraps of electrical tape makes a wire "good as new." In reality, tape is designed as a temporary moisture barrier or a secondary layer of protection. It doesn't provide the structural integrity needed for a permanent fix on 120V lines. Beyond the physical danger, there is a significant financial risk. "Bootleg" repairs that don't meet local codes can actually void your homeowners insurance policies. If a fire occurs and investigators find an uncertified DIY repair on structural wiring, your claim could be denied. Choosing a professional inspection isn't just about fixing a wire; it's about the long-term emotional security of knowing your home is truly protected.
When DIY is Acceptable (and Safe)
Choosing to repair frayed wiring on your own is often a matter of scale. You can safely manage low-voltage items like phone chargers, laptop power bricks, and most low-voltage landscape lighting. These systems don't carry enough punch to cause a major arcing event. You might also consider a temporary fix for a lamp cord, provided you plan to replace the cord or the lamp immediately after its next use. If the damage is strictly to the non-conductive outer jacket and the inner color-coded wires are 100% visible and intact, a careful wrap of tape can prevent further wear until you find a permanent solution.
When to Call Electrical Repair 4U Immediately
Some situations require the tools and expertise of a licensed team to prevent a catastrophe. If you find a damaged wire inside a wall, ceiling, or floor, stop immediately. Structural wiring is complex and must meet specific safety codes that tape simply cannot satisfy. You should also call us for any wires connected directly to your breaker box or service entrance. These lines carry the full load of your home's power. If you see signs of melting, smell burning plastic, or notice that a specific circuit trips the breaker repeatedly, the situation has already moved past the DIY stage. We're here to restore your system to a state of total dependability.
Step-by-Step: How to Fix Minor Frayed Appliance Cords
Safety begins with a simple click of the plug. Before you attempt to repair frayed wiring on a portable device, ensure it is completely disconnected from the power source. This might seem obvious, but skipping this step is a leading cause of preventable shocks. Once the cord is free, run your fingers along its entire length to check for secondary damage. If you find multiple deep gashes or exposed copper in several places, it is often safer to replace the cord entirely rather than patching it.
Once you've isolated the damage, use a cloth dampened with isopropyl alcohol to wipe down the repair site. This removes household oils, dust, and residues that prevent adhesives from sticking. A clean surface is the difference between a repair that lasts years and one that peels off within a few weeks. If the cord is particularly greasy, you may need to wipe it down twice to ensure a perfect bond for your insulation materials.
The Heat Shrink Tubing Method
Heat shrink tubing offers a professional, waterproof seal that mimics the original factory insulation. Select a tube with a 2:1 or 3:1 shrink ratio based on the thickness of the cord. You must slide the tubing onto the cord before you perform any splicing. Once the tube is centered over the fray, use a dedicated heat gun to shrink it. Avoid using a lighter. Lighters create uneven heat and can scorch the new insulation, which compromises the very protection you're trying to build.
Using Electrical Tape Effectively
If you choose tape, the "Half-Lap" technique is your best friend. Start about an inch before the damaged area and overlap each turn by exactly 50%. This creates a double layer of protection across the entire fray. Stretch the tape slightly as you wrap it to create a tension seal that keeps moisture out. Always use black tape for these repairs. It is formulated for superior UV resistance. Colored tapes are primarily meant for circuit identification and can degrade much faster when exposed to sunlight or heat.
For irregular shapes or tight corners where tape won't lie flat, liquid electrical tape is an excellent alternative. Simply brush it on in thin layers and let it cure according to the package directions. Once your repair is complete, perform a quick safety test. Plug the device in for one minute and then unplug it. Feel the repair site. If it feels hot to the touch, the internal copper strands are likely broken, creating dangerous resistance. In these cases, a simple patch isn't enough to keep your home secure. If you're dealing with multiple damaged lines or suspect your wall outlets are failing, our team can help you Repair Electrical Wiring to ensure your system meets the highest safety standards.
Professional Restoration for Structural Home Wiring
When damage moves from a simple appliance cord into the structural bones of your house, the stakes for your family's safety rise significantly. We use a specialized "Cut and Pull" method to handle damaged Romex or older cloth-insulated lines. Instead of attempting a surface-level patch, we remove the compromised section entirely. We then pull fresh, high-quality conductors through the existing framing to restore the integrity of the circuit. This approach ensures that when we repair frayed wiring, the solution is permanent rather than a temporary band-aid. To ensure no hidden hazards remain, we utilize thermal imaging technology to detect heat signatures behind your drywall. This allows us to find smoldering hot spots or secondary frays that the naked eye would never catch.
We also look at the bigger picture of your home's electrical health. Often, insulation breaks down because of repeated minor power spikes that "cook" the wires over time. We frequently recommend Whole-House Surge Protection to prevent this invisible wear and tear. By stabilizing the voltage entering your home, you protect the longevity of your entire wiring system. Our team has spent 40 years as a stable pillar of the Warrenville community, providing the high-caliber results you need to sleep soundly at night.
Code-Compliant Splicing and Junction Boxes
One of the most dangerous mistakes a homeowner can make is "burying" a repair. Per the National Electrical Code (NEC), you cannot simply tape a wire and hide it inside a wall or ceiling. Every single splice must be housed within a secure, accessible junction box. These boxes act as a fireproof vault, containing any potential sparks if a connection ever loosens. Our licensed professionals ensure that every restoration is fully future-proof. When it comes time for a home inspection or a future renovation, your electrical system will stand up to the strictest scrutiny. We don't just fix the problem; we bring your home up to modern safety standards.
Why Local Expertise Matters
Building codes aren't universal. Our decades of experience mean we're intimately familiar with the specific municipal requirements in Elmhurst, Naperville, and Aurora. This local knowledge allows us to work efficiently while ensuring every repair frayed wiring project is completely legal and safe. We believe in neighborly reliability and fair, transparent pricing for every family we serve. Your home is your sanctuary, and we treat it with the same diligence we'd use for our own. Don’t let a small fray become a big fire. Contact Electrical Repair 4U today for a professional safety inspection.
Secure Your Home’s Electrical Future
Protecting your property starts with recognizing that even a small nick in your insulation can lead to a significant fire hazard. You now have the knowledge to distinguish between a simple cord fix and the complex needs of structural home wiring. Remember that while electrical tape serves as a temporary shield for your gadgets, it isn't a permanent solution for the high-voltage lines inside your walls. When you need to repair frayed wiring on a larger scale, choosing a professional path ensures your home remains code-compliant and safe for years to come.
We bring over 40 years of local experience to every service call. As licensed and insured master electricians, we are specialists in animal-chewed wire restoration, protecting families from hidden attic dangers. Our team uses advanced tools like thermal imaging to find what the naked eye misses. Don't leave your safety to chance. Schedule your professional wiring inspection in Warrenville to restore your peace of mind today. We're ready to partner with you to keep your household running safely and efficiently.
Frequently Asked Questions
Is electrical tape a permanent fix for frayed wires?
Electrical tape is never a permanent solution for structural wiring or high-voltage lines. It's designed as a temporary moisture barrier or a secondary layer of protection for surface-level scuffs. It lacks the mechanical strength to protect internal conductors from heat or physical stress over time. For a lasting fix that meets safety codes, you need a professional restoration that replaces the damaged insulation or the entire wire section.
Can I use a frayed wire if I wrap it in tape?
You should only use a taped wire for low-voltage devices, such as phone chargers, or for very brief, supervised use of a small lamp. Wrapping a 120V structural wire in tape and leaving it active creates a significant arcing risk. If the internal copper is even slightly damaged, the tape won't stop the heat buildup that can lead to a fire. It's always safer to cut the power until a proper repair is made.
How much does it cost to repair a chewed wire in an attic?
The investment required to repair frayed wiring in an attic depends on the accessibility of the damage and the number of circuits involved. Factors such as the type of insulation present and whether we need to install new junction boxes also influence the final scope of work. We focus on providing fair, transparent assessments that prioritize your home's long-term stability and safety without unnecessary add-ons.
What causes wires to fray inside a wall without being touched?
Wires inside walls often degrade due to thermal expansion and contraction caused by overloaded circuits, which melts the insulation from the inside out. In many older DuPage County homes, the original insulation materials simply become brittle and crack with age. Small vibrations from nearby plumbing or structural settling can also cause wires to rub against rough wood studs, eventually wearing through the protective outer jacket.
Are frayed wires covered by homeowners insurance?
Homeowners insurance typically covers electrical damage caused by "sudden and accidental" events, such as a lightning strike or a fire. However, damage resulting from long-term wear and tear, age, or a slow rodent infestation is often viewed as a maintenance issue and may not be covered. It's best to check your specific policy or speak with your agent to see if your restoration costs qualify for a claim.
Can a frayed wire cause a circuit breaker to trip repeatedly?
A frayed wire is a primary cause of repeated breaker trips because it creates a short circuit or a ground fault. When the exposed copper makes contact with a metal box or another wire, it creates a surge of electricity that triggers the breaker's safety mechanism. This is your system's way of preventing a fire. You should never force a tripped breaker to stay on until the underlying damage is professionally addressed.
How do I know if a rodent has chewed my electrical wiring?
Common signs of rodent damage include flickering lights, unexplained power outages, or the faint smell of burning plastic near your walls or vents. If you find shredded insulation or droppings in your attic, there's a high probability the local wildlife has also been gnawing on your cables. We use specialized tools to inspect these hard-to-reach areas and identify exactly where the critters have compromised your home's security.
Is it safe to repair a frayed vacuum cleaner cord myself?
It's generally safe to perform a DIY repair on the outer jacket of a vacuum cord if the inner color-coded wires are 100% intact and visible. Using the heat shrink tubing or half-lap tape methods we've outlined can effectively restore that protective layer. However, if you see any bare copper or the cord feels hot to the touch while you're cleaning, the internal strands are likely broken. In that case, the cord is a hazard and requires a full replacement.